Upper Boot – How to replace the hood wear strips located inside the upper boot Hood
Words and Pictures: Alan Sykes
Over time, the underside hood cover wear strips start to deteriorate, if you want the car to be at its best, they will need replacing. Also, because the paint is very thin with no lacquer, sections of the paint can become damaged, especially alongside the “L” shaped stickers.
Kevin from the Owners Club wanted to look at resolving this issue.
All four hood cover stickers (I tried to remove the offside “L” shaped sticker).
The challenge was to investigate a way of replacing them, it is nice to be working on a mini project. Kevin decided that he would have a chat with the Figaro Shop and ask them how to remove them without damaging the paint. Me being my normal impatient me though, I could not wait. After all, “How hard could it be.”?
Stage 1
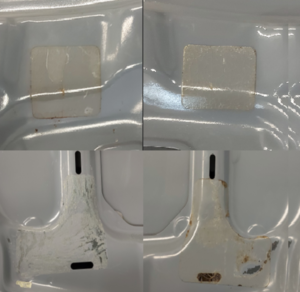
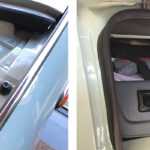
Without waiting for Kevin’s conversation with the Figaro Shop, I broke out the heat gun and on the lowest setting, warmed up the offside sticker and gently scraped it off with a plastic scraper. It seemed to be going well, the sticker came off easily, but it left a very sticky residue behind.
Stage 2
Having removed the sticker, I immediately tried to remove the glue, a big mistake, probably because the paint was still slightly warm and therefore perhaps still soft, but it might have been because the paint was thin and not lacquered, I am unsure.
As stated, this rapidly became a disaster.
The paint on the underside of the hood cover was the original paint from the factory, and it is only an exceptionally thin light dusting, that’s apart from near the edges.
On the underside of this panel, 80% of the paint finish does not have a lacquer coating.
Unfortunately, while trying to remove the glue firstly by scraping it off, then with Evostik remover and then with white spirits, it brought small sections of paint off with the glue, nothing I tried worked.
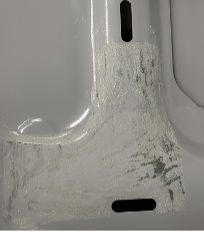
The offside sticker was removed, but traces of the glue are still there despite trying to gently remove it.
Stage 3
Now I had a big decision to make, what route should I take going forward? Because my original intention was just to replace the stickers with Clear Helicopter Tape, anything but a perfectly painted surface underneath the upper hood would have looked like a mess. Potentially it would have been an option to try and rub the paint/glue off, then to paint just where the stickers were, but to be honest, it would have looked a mess.
The best course of action was to take the hood cover off and take it to the paint shop.
Stage 4
In my opinion (and everyone is different), it is best to keep cars as original as possible (within reason and cost), I asked the paint shop to paint the whole of the hood underside, but not to gloss lacquer it.
However, the paint shop suggested that a 75mm section around the outside of the hood cover should have gloss lacquer applied, this area meets the seals and must withstand abrasive movement. Note, I did ask them to mask off the original foil boot label.
Because the hood was in the paint booth, I also asked them to paint the recently fitted stainless steel boot lamp bracket, this now looks nice in Lapis Grey.
Stage 5
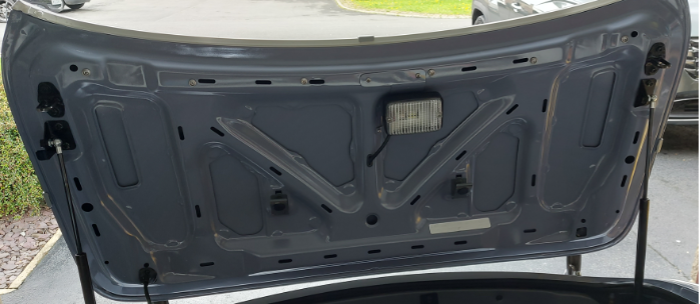
The hood cover is back on the car, it’s aligned, and all the fittings are back on.
Note, the paint shop suggested waiting several days before applying the stickers to allow the paint to harden.
The hood cover is refitted with all ancillary equipment apart from the stickers.
Stage 6
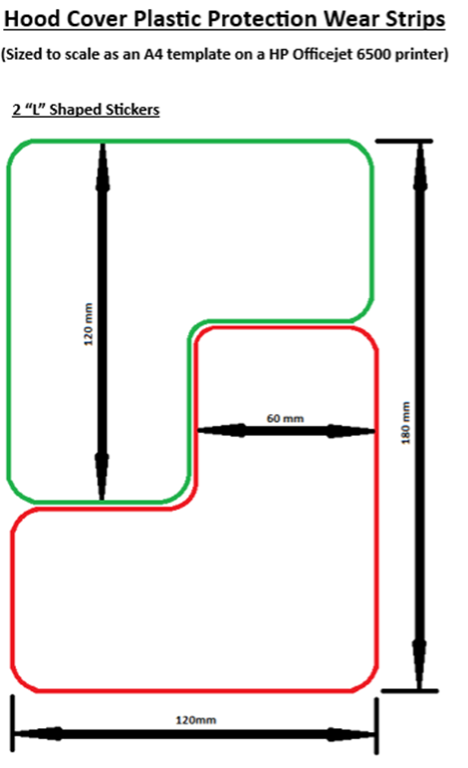
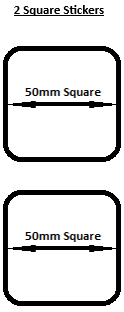
Prior to ordering the clear Helicopter tape, I measured the existing stickers and made up a Microsoft Word “to size” template of all four stickers.
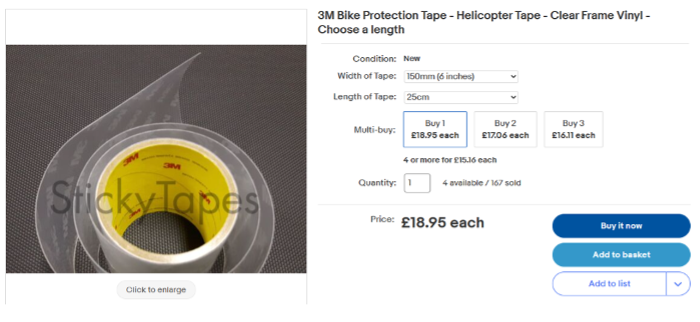
I ordered a piece of 3M Helicopter tape from eBay, this was 150mm x 250mm (you need a piece around 125mm x 235mm), this was sufficient to make up all four stickers. The 3M tape is quite thick and should be excellent quality long term.
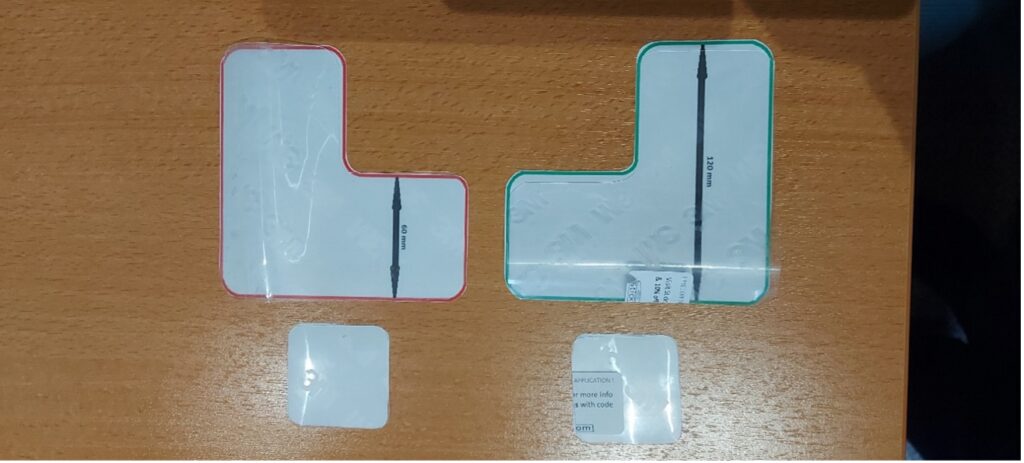
Four stickers were cut out of the single eBay sheet of helicopter Tape.
Helicopter tape from eBay, expensive 3M tape was ordered because of the quality.
Helicopter tape cut from the templates and ready for application.
Stage 7
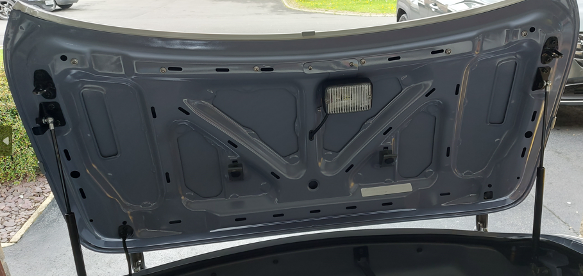
After allowing the paint to harden for several days, the stickers have now been replaced in the original locations.
It is nice that the original matt finish has been retained to some extent, and the whole underside of the hood lid now looks factory fresh. The project did turn out to be a lot more expensive than originally intended because I needed the underside of the hood painted, but it is one more improvement for the Figaro
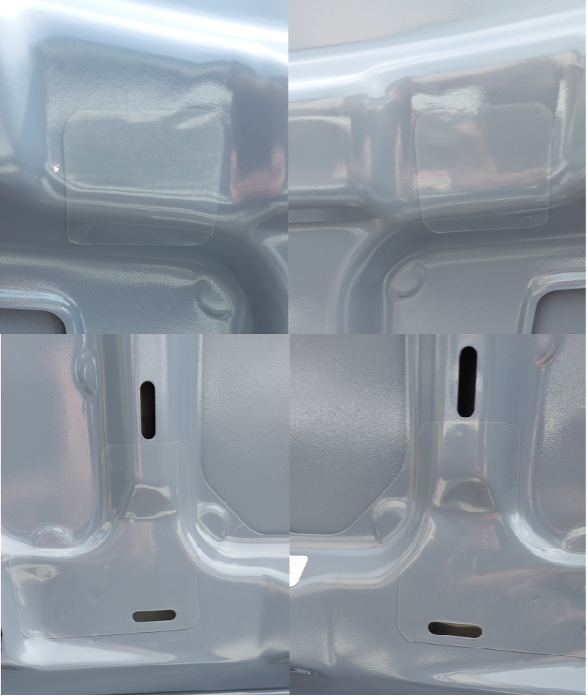
Hood lid with the 3M replacement stickers.
The hood lid was refitted with all ancillary equipment and stickers.
(You need to look closely at the picture to see them)
Note, that this is only my opinion!
Unless you want to have the expense created by having the whole of underside of the hood cover painted, DO NOT ATTEMPT TO TAKE THE STICKERS OFF!
There might be another way, perhaps you could cover the existing stickers with black stickers, carbon fibre look-alike stickers, or coloured stickers (colours are very limited), I don’t know the answer.
Enjoy.
Related posts:
 Brake Light – Parcel Shelf Leather Trimmed Brake Light Bar
 Roof – Handle Gutter Protector
 Clock – Digital Clock Upgrade
 Strut Brace – fitting to a Nissan Figaro to improve handling video
 Seats – Figaro Upholstery & Interior Services
 Engine Low Coolant Alarm – how to fit on a Nissan Figaro video
 Door Striker Plate – fitting on a Nissan Figaro video
 Rust – Engine bay and inside lower boot video for a Nissan Figaro