Dashboard – Renovation
The Figaro dash top can suffer from cracking especially if the car has been left outside for much of its life. The reason this happens is the material used reacts over time to heat and UV rays causing it to expand then crack. Depending on where the crack appears this can sometime be fixed cheaply using strips of metal, although this does not look that great we have seen many cars with this fix which is easier than removing and recovering the dash.
If you want the car to look like it did when it was first manufactured unfortunately it means removing it as carrying out a repair whilst the dash is in situ is not possible. This is not a typical DIY project as a complicated and difficult job (see 112 pictures below) however, if you have the time then it can be achieved. If you do not have the skills we recommend approaching a garage who has previous knowledge and understands what needs to be done. See a list Click here
REPAIRING
Once the the dash is out you need to fill the cracks with a body filler sand and the top can be recovered. This can be done if you have also covered the rear panel of the car using the same processes or you can send it away and ask a garage or use someone like Steve Newbold below.
Club Member Steve Newbold offers this service from £200 and can be contacted
- Telephone: 07745 570684
- Email: figaroupholstery@fastmail.com
Below are pictures of one of Steve’s repaired projects
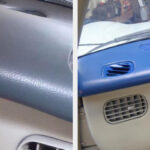
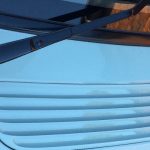
THE DASH HAD BAD CRACKS AND SPLITS

CRACKS FILLED AND SANDED FLUSH

NEW MATERIAL APPLIED. CAN BE DYED ANY COLOUR TO MATCH CAR

To find out more about this item refer to our Parts & Services Directory – Click here
Below is a breakdown of the tasks involved and 112 pictures
Image – Task
0394 – Removing the 10mm nut covers to gain access, carefully prise off
0396 – Pull off heater knobs
0398 – Carefully box all parts for re assembly
0400 – 5 Screws hold the steering column cowling on. Watch for aftermarket switches and alarm wiring
0401 – removal of cowling, prise apart
0402 – Stereo removal, 2 large screws either side
0403 – Stereo 2 small screws
0406 – Unplug multi plug connector and aerial from rear of stereo
0410 – Removing stereo panel, 8 screws.
0414 – Stereo panel
0418 – Carefully prise down and pull out stereo panel
0419 – Disconnect boot pop switch
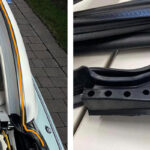
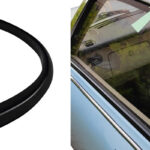
0420 – Remove door seal rubbers
0421 – Very common dash split appears on most cars, the dash is still reasonable well supported without this.
0422 – 2 x Torx bit bolts either side
0425 – 5 x 12mm bolts support steering column, remove and gently let column drop down, leave keys in ignition with steering lock not on. This will ease access
0430 – The rest of the steering column bolts
0435 – Behind dropped steering column remove this plastic pipe
0437 – Unplug wire from heater controls, sits behind where stereo used to be
0442 – Unscrew 1 screw holding heater control arms to dash
0443 – 10mm nut removal on top of dash x 2
0446 – 2 person job, gently lift and then pull back on dashboard, be careful of any tangled wire
0459 – Out it comes
0461 – Carefully rest dashboard on a stand to begin changing top part
0466 – Remove heater pipes marked ‘L’ and ‘R’
0469 – Gently pop out centre vent covers x 2, these are very brittle
0473 – Pop out end air vents, from rear of dash and push through
0475 – Remove all screws in cavity as well as the similar ones which screw in from behind along the edge that used to sit against the windscreen
0481 – Gently manipulate dash top off
0483 – Reverse process with new or refurbished dash top
0487 – 2 people carefully feed dash back in, this is always a bit fiddly
0488 – Make sure to gently get the 2 guide holes back over the studs
0495 – Refit torx bolts; carefully this is the most fragile area
0497 – Refitting all the fixings that were removed
0499 – refitting air pipes
0505 – Continuing re fit trim
0506 – Raise steering column and re fit cowling
0509 – Refit stereo panel and stereo
0513 – Refit door seals
0516 – Check all switches and buttons
Give a good clean, stand back and admire your work….
Related posts:
 Seat – Front Seat Base Springs (set)
 Roof – Seal replacement
 Trim – Exterior Upper Door Trim Seal for a Nissan Figaro video
 Rust – Re-routing Nissan Figaro roof drainage hoses to prevent lower sill rusting
 Dashboard – How to repaint the top section
 Wiper Arm – How to remove and paint the wiper arms on a Nissan Figaro
 Painting – Interior Paint touch up ivory paint spray for a Nissan Figaro video