Rust – painting the Nissan Figaro exterior
 Words and Pictures Tobyn Brooks – The Figaro Shop
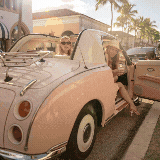
 Painting a Figaro is a much more enjoyable process in terms of aesthetics. One that can make a slightly tired-looking car into a vibrant, gleaming one again………or even a unique extension of your personality!
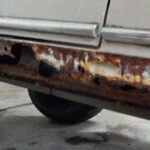
I wanted to show you this in detail as like some other repairs it’s hard to demonstrate what’s involved. I’ll take off from the point the Figgy has its rust repaired, the process would be almost identical if it were for a dent or a new panel.
PREPARING THE SURFACE
First, the area is prepared for primer, the technician gets the area as close to the final shape as possible, this involves using a hammer and a rounded block of solid metal called a ‘dolly’ to gently tap the metal to the required shape, it also includes the use of body fillers which are spread on like putty and then rubbed down to create the desired shape. The idea is to get the shape perfect whilst not using too much filler. On some poorer repairs, the filler is used instead of either welding or hammering a dent out. This speeds up repair time but shortens the life of the repair, cracks and bubbles can appear within weeks.
APPLYING THE PRIMER
Once the area is shaped correctly it’s sprayed with a primer, this is a thick coat of paint which will seal the repair and also help remove any final small imperfections. When fully dry the primer is sprayed with a light coat of paint called a ‘guide coat’, this coat is rubbed away with sandpaper and helps the technician to see if they have any small indentations in the repair area. The aim is for the primer to be silky smooth and have no remains of the guide coat in any crevices.
MASKING THE CAR
Following the primer being smoothed to perfection, the area is carefully masked up, using a mix of masking tapes and non-static plastic sheeting. There is quite an art to getting this tight and the masking lines perfect. For the best job possible on your, Figaro try to remove all fixtures and fittings, trying to mask these up will save time but will cause the paint to peel away later on. Once masked and in a clean, dry, well lit and ventilated area (ideally a paint booth) the car is finally ready to paint. This preparation can take anything from a few hours to weeks depending on the size of the area being painted and the number and severity of the repairs.
CLEANING
Before final painting the area must be thoroughly cleaned with a solvent-based degreaser, grease is the painter’s enemy and the smallest amount of oil or silicone product in the area can cause huge problems.
BASE COAT
The process starts with a ‘base’ or coloured ground coat, 2-3 coats are applied evenly to produce the desired effect. It’s very important that the coats are equal, if not the finished product can have shadows and clouds.
APPLYING THE LACQUER
Once the base coat is applied and has dried the painter will check for any imperfections and then spray 2-3 coats of lacquer. The lacquer gives the paint its shine and ensures it’s hard-wearing and long-lasting. This is the point at which the car gets its stunning glossy shine and also the time you can stand back and admire all the hard work so far.
POLISHING
Good quality paints need to be baked at a very specific temperature, this allows the lacquer to harden correctly and prepares it for the next process, polishing. The polishing involves firstly rubbing down any minor imperfections or dirt in the top coat, these are usually from dust which was in the air and landed on the panel, this is done gently using a very smooth sandpaper. Then the entire painted area is polished using an electric circulating polisher and a slightly abrasive polish.
Doing this is one of the steps that makes a good paint job into a great paint job, it’s easy to spend days on this process if you’re seeking a high level of finish.
At this stage, the Figgy usually still needs the chrome trim to be assembled but it’s always a clear turning point of any repair or restoration, it’s a very satisfying feeling when you stand back and admire the car.

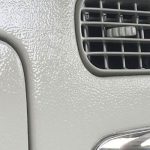
Image 1
Here is the panel all ready for primer, the repairs and filling are complete and have been rubbed down.
Image 2
The panel is primed, usually with a thick ‘high build’ primer.
Image 3
You can see here the panel has now been ‘guide coated’ and is being rubbed off smoothly.
Image 4
The degreasing takes place with a special ‘tacky’ cloth and the degreasing fluid.
Image 5
The base coat gives the colour but the shine will come once the lacquer is applied.
Image 6
The lacquer is the most tricky part to apply, done well it looks amazing!
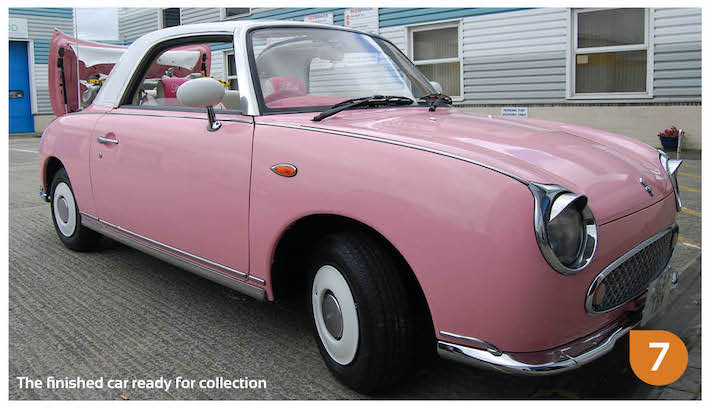
Image 7
Whether the car is an original shade or a vibrant custom colour the process is still the same. The results too, always win a smile, no matter what the colour!
WHAT ARE THE COSTS TO REPAINT THE CAR
As a rough guide, The Figaro Shop will completely strip, prepare, paint and refit a Figaro for the body- coloured paint is £3,500.00. Obviously, if the car needs repairs and corrosion works this is then an additional cost to the job.
Contact The Figaro Shop
Watch more of our YouTube Ownership Help Guides

Related posts:
 Rust – how to replace the door sills on a Nissan Figaro video
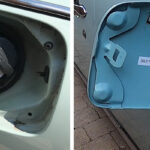 Painting – Fuel Cap how to restore the inside of the fuel cap on a Nissan Figaro video
 Painting – Original Centre Console
 Rust – Engine bay and inside lower boot video for a Nissan Figaro
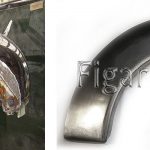 Rust – Rear Wing Arch repair panel for a Nissan Figaro
 Painting – Interior Paint touch up ivory paint spray for a Nissan Figaro video
 Dashboard Fascia – how to repaint on a Nissan Figaro video
 Cleaning – Drain Holes how to clean to allow water to drain on a Nissan Figaro video