Engine – Cambelt (Timing Belt) Change on a Nissan Figaro
The Cambelt is designed to keep the bottom half of the engine (pistons and crankcase) in sync with the top half (valves and cylinder head). It is one of the most important and essential parts of the engine and if it breaks or even slips the car can overheat very quickly and the damage to the engine can be terminal!
HOW OFTEN SHOULD IT BE REPLACED
Nissan recommends replacing every 4 years or 50,000 km whichever comes first.
COSTS
The timing belt, tensioner and water pump take around 2.5/3hours to complete. The average hourly workshop rates are around £60 (see our Garage Directory) so assume £180 labour + Parts which are around £110 so expect to pay £290 + VAT.
PARTS REQUIRED
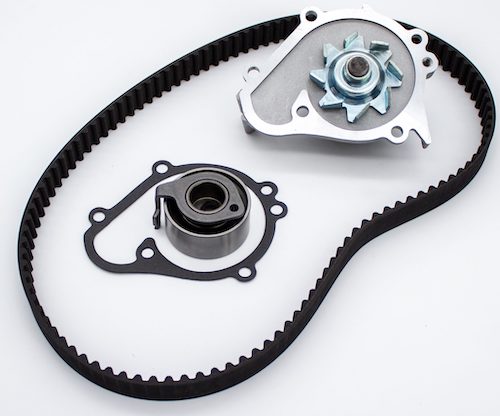
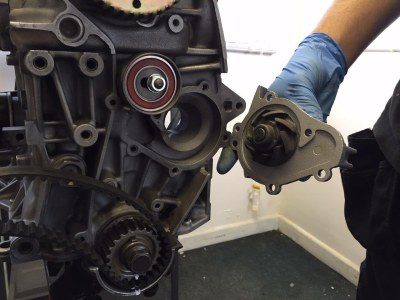
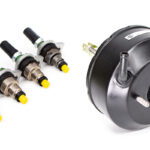
This picture shows the parts required for this job. The water pump is also driven by the timing belt and it is good practice to change this too. Included in the kit are the following parts:
- Timing Belt kit with tensioner
- Water pump
You can buy direct from The Figaro Shop – Buy here
Or Google: Nissan Figaro Cambelt, tensioner and water pump kit and browse similar parts
DO IT YOURSELF!
You may wish to carry out the work yourself and below is an article published by the founder of The Figaro Shop which may help you.
Words and pictures: Toby Brooks The Figaro Shop
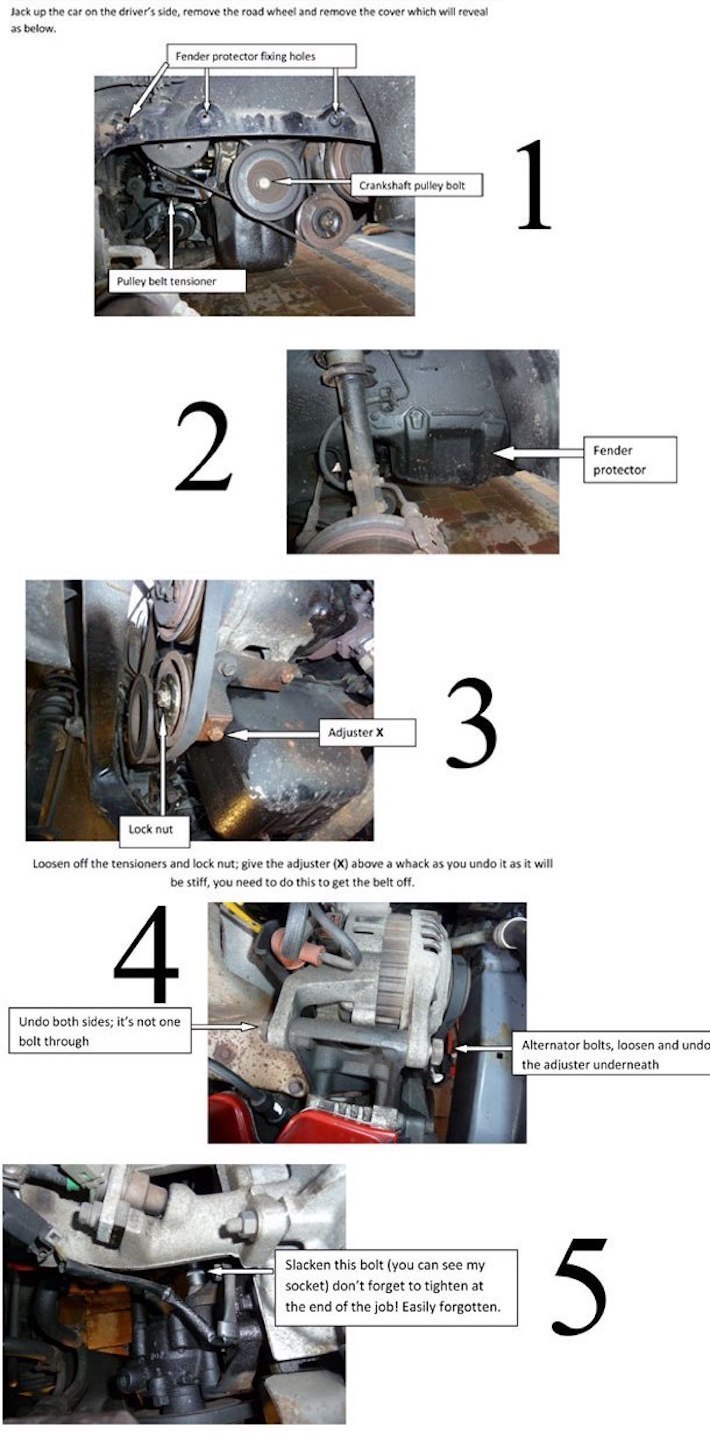
 To start with access is a big problem, you will need to remove the engine mount on the OS of the car, plus the belt covers and the pulley for the auxiliary belts. This process is almost a class in itself so I’m going to explain it on a high level and talk in more detail about the cambelt changing itself. As a guide, the removal and refitting of the auxiliary belts, cambelt cover and mount take around 2-3 hours and is one of those fiddly jobs that you’re pleased to get to the end of.
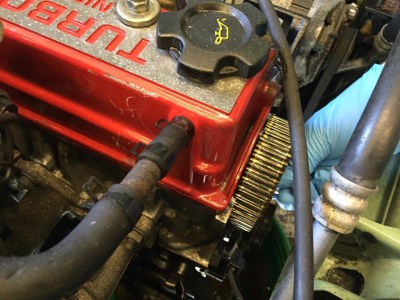
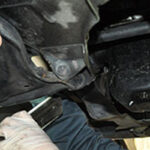
Access to the bolts which hold the engine mount doesn’t even allow enough room to get a normal-sized socket in! You can see how limited access is even once the cover and mount are removed. I’ve used an engine on a stand FOR MOST OF THIS ARTICLE to make this article easier to understand see the above picture!
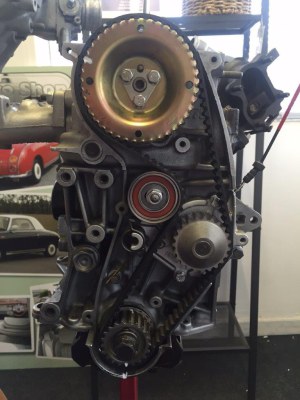 So, you have removed the cover removed the engine mount and you’re finally into the heart of the job, your engine should look like ours does in the picture here.
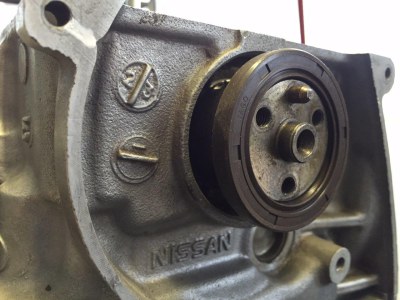
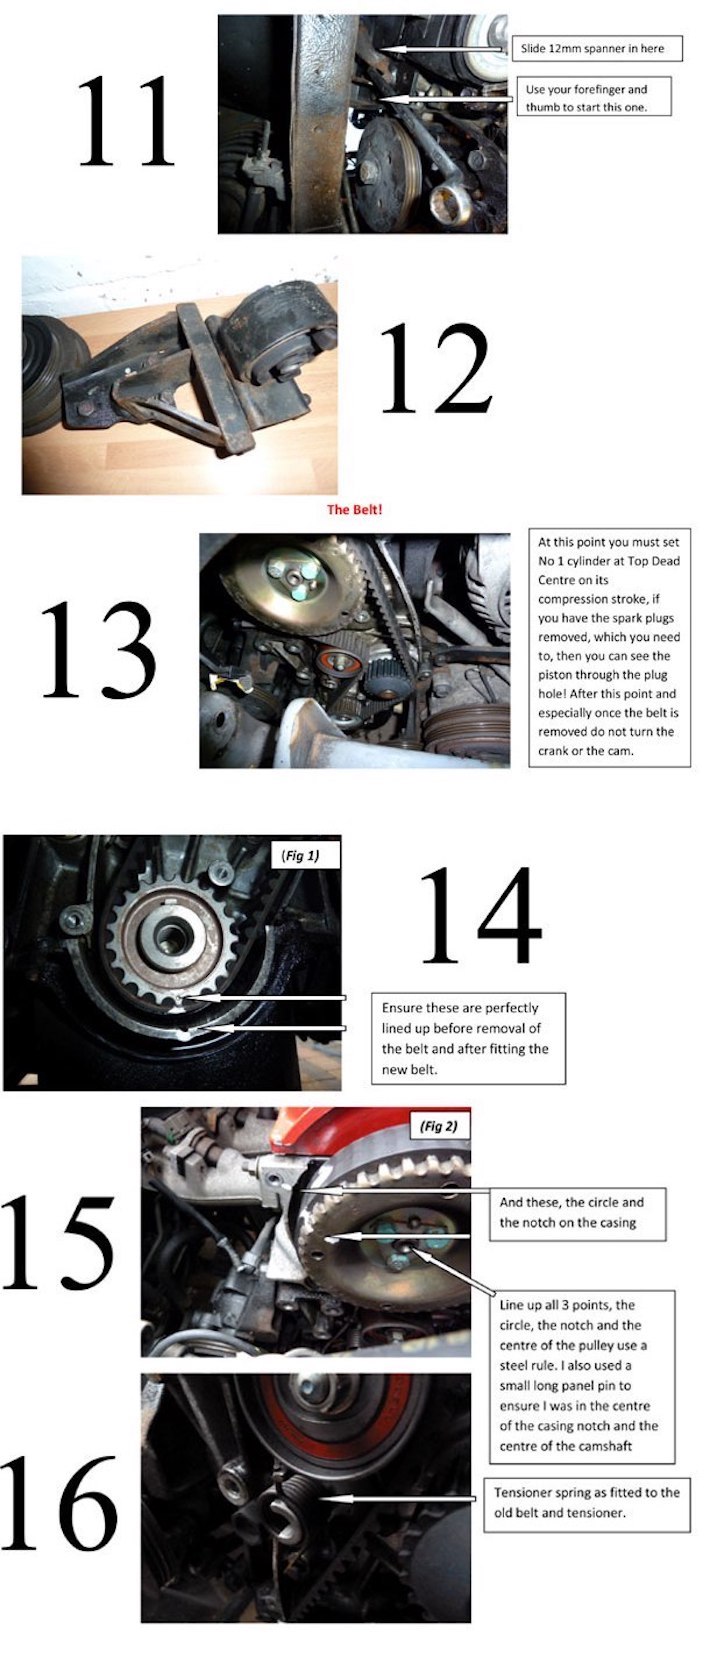
Here you can see the TDC Top Dead Centre marking
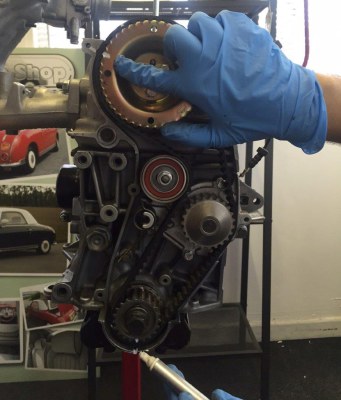
The most important way to start is by marking all the parts that could be reassembled out of position, we use a paint marker to do this. You can see IMAGE 4 we have marked TDC (top dead centre) this is with the cam wheel (top pulley) is facing directly upwards and the small dot on the crank wheel (bottom pulley) facing the bottom. Once marked in their positions you can release the cambelt tensioner and then remove the belt.
“Our advice is to replace every 50,000 miles or 4 years, this is on the cautious side but it’s better safe than sorry”
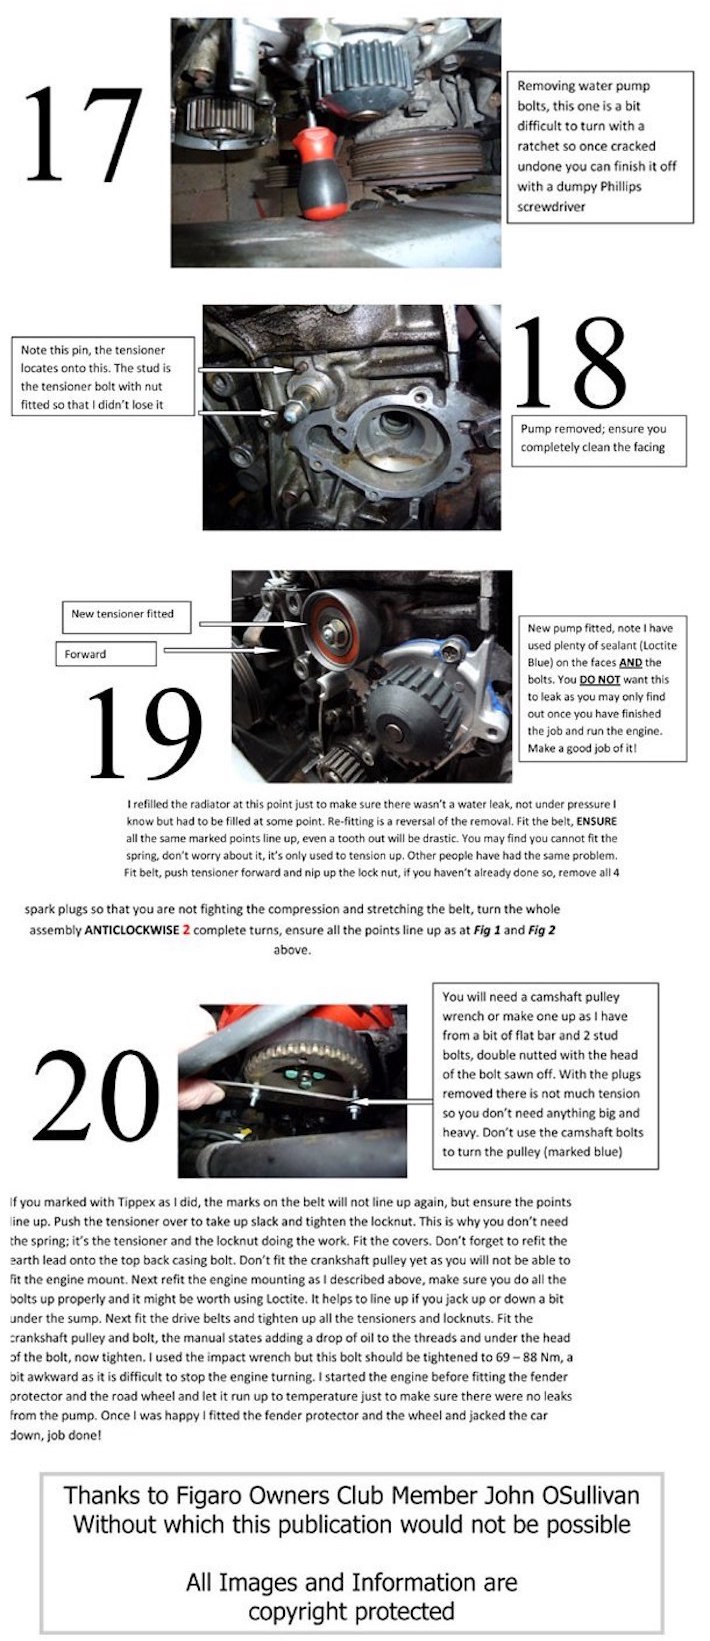
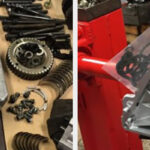
 Once removed it’s time to change the all-important water pump and seals. The water pump is held on by 10mm head bolts that screw into the engine block (one will already be missing as it helps hold the cover in place).
Once removed, (and you may have to tap the pump to dislodge it) you can clean up the engine surface to create a good seal with the new pump. This is fiddly but take your time as if it leaks when you run the car it’s back to square one! We always use a bit of gasket sealer to assist. Once the bolts are tight don’t loosen them again. You can see the pump next to the cleaned and prepared engine block, see picture.
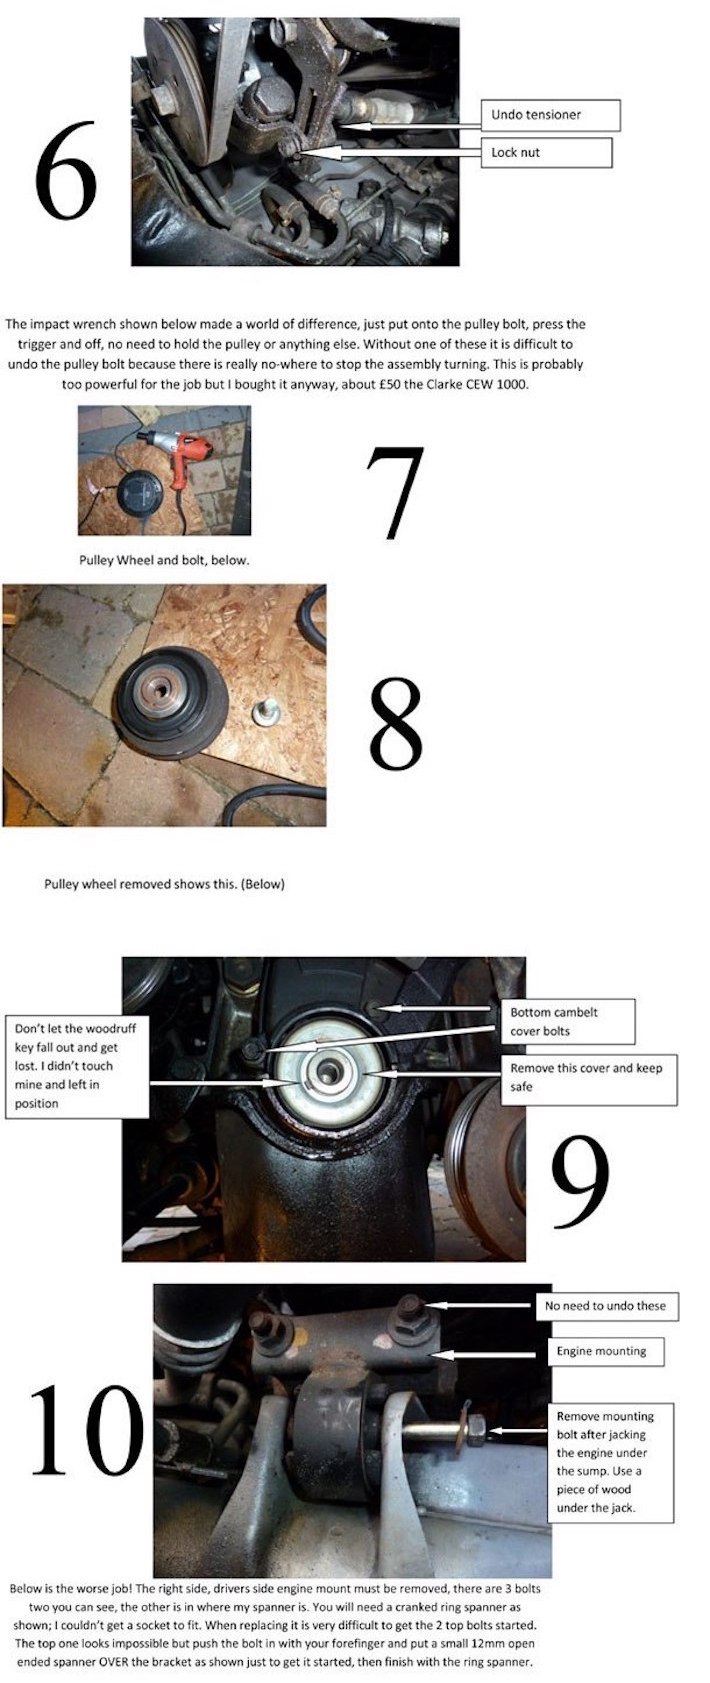
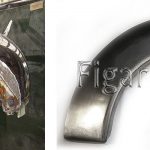
 Following this, it’s the two seals, cam and crankshaft. The crank wheel will gently prise/tap off, be sure not to lose the small keyway which locates it, it’s a tiny half-moon shaped piece of steel that locks the wheel so it moves in time with the shaft. The cam wheel on the other hand is bolted down, three small 10mm headed bolts and a triangle-shaped washer hold the wheel down. With the wheels out the way, you can see the seals.
There are a number of ways to remove the seals, either a small screwdriver, a pick or a hook will help. We use a hook as you can see here.
 Either way, these are a pain to remove but be sure not to mar the shaft, this can also cause the new seal to leak and the shaft to tear the seal apart. Once you have the old seal out the new one needs to be pushed back in, it’s a tight fit and the seal must go in perfectly straight to avoid it coming back out later once the engine is rotating.
Here you can see the new seal going into place.
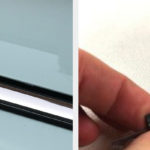
 Once the wheels/pulleys are back on and the water pump is in place it’s time to fit the new belt. Ensure the writing on the belt is facing you and reads right to left. Make sure you fit the new tensioner before you start pulling the belt back on, pinch the 12mm securing nut with the tensioner slightly pulled back. We install the ‘tensioner helper’ spring at the very end as it tends to jump off but you can put it on whilst fitting the belt. Although the spring is there to hold the tensioner tight it’s really the nut that secures it, the spring is more of a back up in our opinion. In this picture, we are just pulling the new belt over the tensioner.
Make sure to keep your reference marks aligned pull the belt over the two pulleys and around the tensioner, once it sits in the centre of the tread you can load up the tensioner. Once you have loaded and then tightened the tensioner you must then check your marks again. It will probably take a few attempts to get this right. The tension of the finished fitted belt should be so that it will twist or swivel to around 45 degrees with a little pressure, test this using your fingers. Once you are happy everything lines up rotate the engine 4 times by hand, clockwise. We fit the bottom pulley and rotate using the bolt. If the marks line up and there is no resistance or obstruction during the rotation then you have succeeded.
Once the brackets, covers and mounts have been reassembled the car should start and run exactly as it did before changing the belt.
Please be aware that this article is based on our experiences and we cannot be in any way responsible if you try this job and have problems or cause damage to your car, it’s a very tricky process and you need to bear this in mind.
BREAKDOWN OF THE 20 STEPS
Below is a breakdown of the steps required to complete the job.
WATCH THIS VIDEO
We found this video on YouTube which may help
HELP GUIDES GALLERY
Watch more of our YouTube Ownership Help Guides

Related posts:
 Annual Servicing – A comprehensive Video of what should be covered during a service
 Rear Window (Heated)
 The Figaro Shop launch 10 new Figaro products
 Servicing & Maintenance Costs
 Trim – Chrome Strip Rubber Seal replacement on a Nissan Figaro video
 Rust – Rear Wing Arch repair panel for a Nissan Figaro
 A to Z of Parts
 Leaks – Oil Leaks on a Nissan Figaro video