Rust – how to replace the door sills on a Nissan Figaro video
Words and Pictures by Tobyn Brooks The Figaro Shop
Two ways to repair a sill on a Figaro: rust repair can be done on the sills of a Figaro with a relatively cheap ‘quick fix’ by welding over the top, but at The Figaro Shop we do it differently by totally removing all of the rusted metal and replacing the whole sill to make it structurally stronger and last much longer. The sill of the Nissan Figaro not only forms the shape of the vehicle but also plays a large part in the rigidity of the vehicle’s body. Over time, rust can start to corrode the sills causing unsightly bubbling, major paint defects and in the worst of cases, large holes of rust. As the rust sets into the steel of the sill, it can dramatically affect the strength of the body and is therefore an MOT failure on inspection.
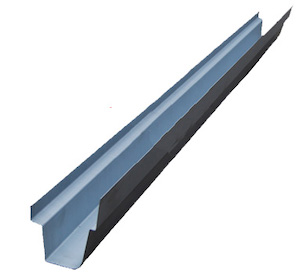 These custom-made sill sections are designed to replace your rusty Figaro’s inner sill. Unfortunately with the age of these vehicles rust is becoming a bigger problem. You will find that when the outer sill panels need replacing, the inner sill section will need to be replaced too. The inner sill repair panel has been designed and developed by ourselves and is machine-formed from Zintec steel to ensure every panel is the same and follows the original shape of the Figaro sill which is hard to replicate by hand at 1500mm in length. It makes it possible to repair the inner sill to a high level, We use these in-house to repair customers’ Figaros to a high standard. Please be aware this is not a generic/universal panel.
Nissan Figaro Custom-Made Inner Sill Repair Panel BUY NOW
HOW THE SILL IS WELDED INTO THE FIGARO
I decided it would be good for owners to know what went on when their car had this ‘open heart surgery’. Although it’s not the most glamorous diagnosis, there is no denying the fact that most Figgys will suffer from rust at some stage! One of the hardest areas for us to describe, and to warrant the cost of repair, is corrosion. Figaros corrode in 4 common places Sills, Arches, Boot Floor and Roof Corner. Today we will focus on the sills as they are the most common MOT failure we see.
Figaro sills are formed in complicated shapes, the layers of box sections press together in order to create the strongest structural integrity. On convertibles especially this is very important. When an owner comes to us with their cherished Figaro, looking for restoration or paintwork, they nearly always leave with a huge smile,
sometimes even tears. That’s a great part of our job. The slightly disappointing thing from our point of view is that with sill corrosion repair the car still looks the same, and runs the same, it may on the surface seem that the MOT and invoice are the main achievements!
So, I hope this article will encourage you to see the beauty in all restoration, even the barely visible parts. With this in mind, I hope to outline what we go through in order to make a sill repair in the correct way. These cases often begin with the Figgy owner bringing their car in for restoration, or perhaps the car is here already having failed an MOT on structural corrosion.
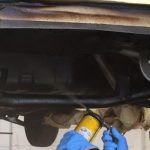
Once we have discovered that the sill is rusted our first task is to remove all the chrome trim; we need access. In severe cases, we also need to remove the door.
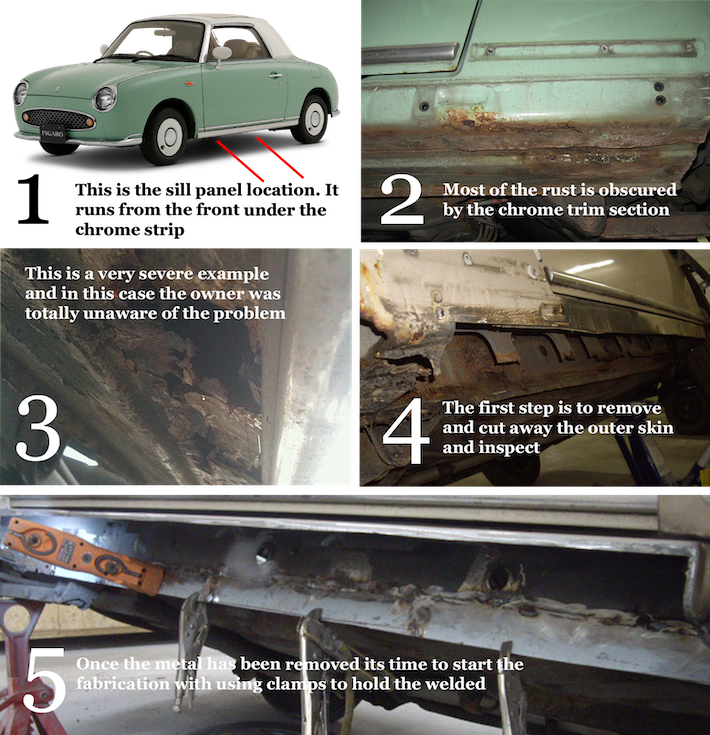
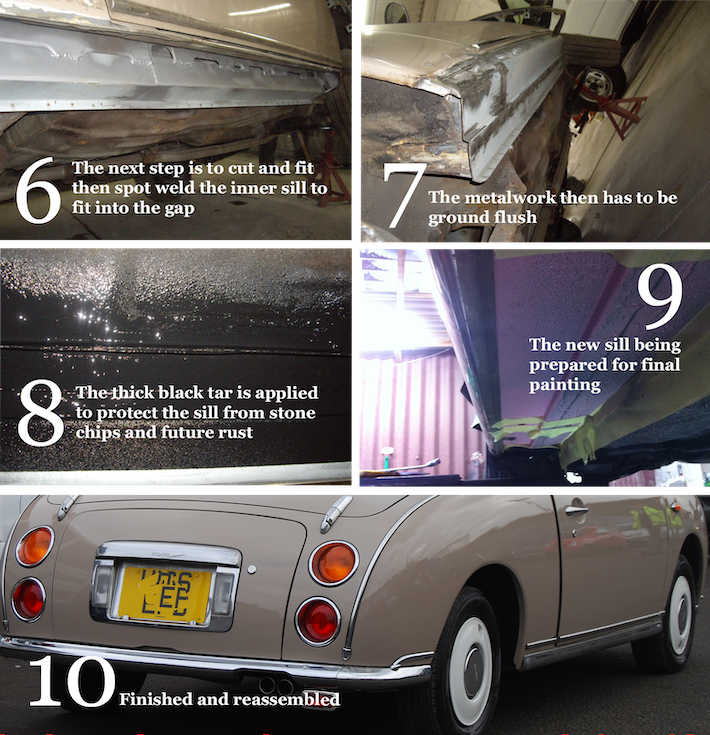
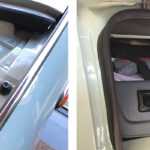
Image 1 – You can see in the image the car before the chrome is stripped, this is the sill. It runs front to back and is the area you see when the door is open however its usually the out-of-sight areas which corrode.
Image 2 – Once the chrome is stripped the car can be fully assessed. When inspecting sill corrosion we will also look for corrosion in the floor joints, heel plates and seat belt anchorage points.
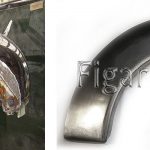
Image 3 -You can see what nasty surprises are often lurking behind trims and sometimes sub-standard previous repairs!
Image 4 -The first step to the sill repair is always to cut away the outer skin and inspect, sometimes it’s just this layer but in most cases, it’s more. In the images we are using the car needed 4 layers – the inner heel plate, part of the floor, the inner sill, and the outer sill. The inner sill helps to create the strength.
Image 5 – Here we have cut away the corroded outer and inner sill structure as well as corrosion located on the floor joint. We are replacing that floor lip ready for the inner and then outer sill to be welded in place.
Image 6 – Here is the new inner sill structure taking shape, carefully cutting and spot welding this in place takes a lot of man hours.
Image 7 – Here is the outer sill repair panel after being trimmed to fit the cut-away section and then being welded in place.
Image 8 – The new sill is stone chip protected and then cavity waxed inside all the box sections to try and prevent future corrosion as much as possible.
Image 9 – You can see here whilst the sill is prepared for paint, it has already been stone chipped giving it the textured finish. A well-crafted sill should look straight as though it has never been repaired.
Image 10 – Once complete there should be no trace of repair, the car is structurally sound and ready to enjoy again.
Video by The Figaro Shop
Watch more of our YouTube Ownership Help Guides

Related posts:
 Rust – Engine bay and inside lower boot video for a Nissan Figaro
 Suspension Top Mounts – replacing on a Nissan Figaro to improve handling video
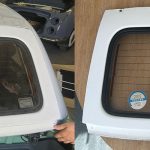
 Rust – Rear Wing Arch repair panel for a Nissan Figaro
 Lighting – LED Instrument Lighting upgrade for a Nissan Figaro video
 Handle Chrome Surround – kit upgrade for a Nissan Figaro video
 Rust – Rear Window Frame for a Nissan Figaro video
 Cleaning – Drain Holes how to clean to allow water to drain on a Nissan Figaro video
 Painting – How to protect the underside of a Nissan Figaro video