Remote Control Nissan Figaro – how to make your own 1/64 scale remote controlled Nissan Figaro
Words, Pictures and Video Calu Thierry
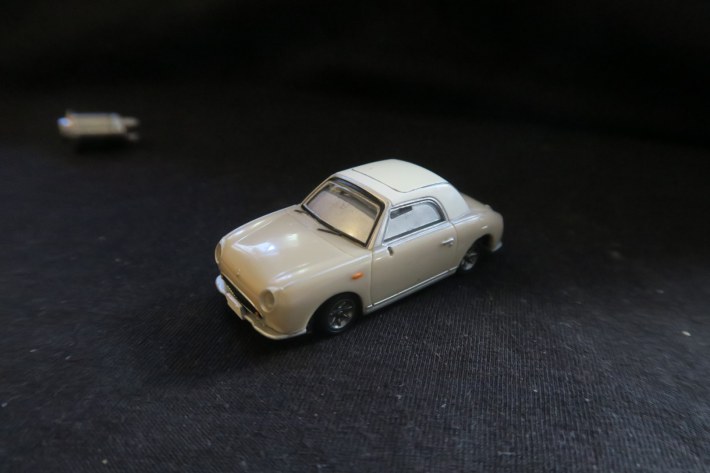
This is a tutorial to allow you to make yourself a mini Figaro at 1/64th radio controlled… You don’t think you can do it, probably and yet it’s easy, follow me…. This is the principle of Kiss model making
NB I’m not a model maker, I just butchered some plastic models in my teens, like many of us… and I suffer from tremor, so if I did it, you can do it!
Parts
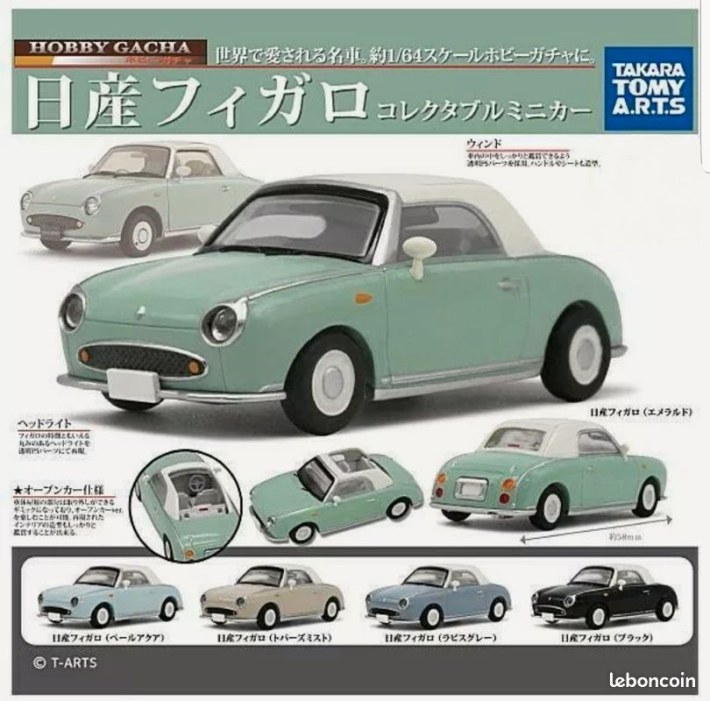
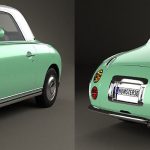
• A 1/64th mini Figaro from Hobby Gacha
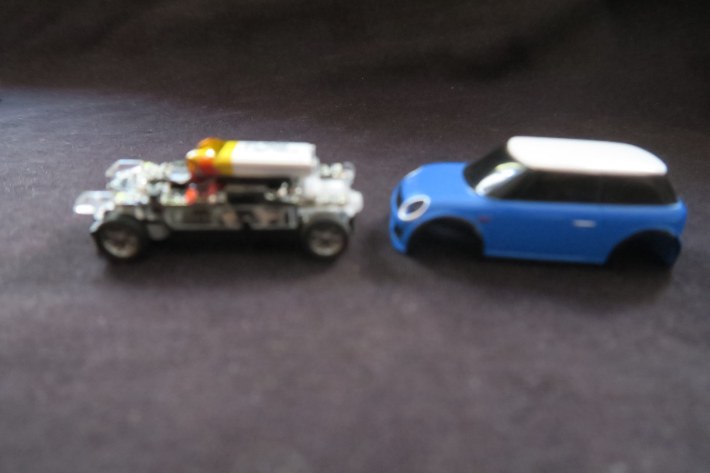
• A 1/76th mini BMW from Turbo Racing Click here

• A Dremel type mini drill or good quality 240 grit sandpaper
• 1 small brush
• A little expoy glue and/or a little cyanoacrylic glue
• A little black paint
• A little aluminum gray paint
• A little Patatfix or other
• A razor blade or better a scraper blade
• A bit of modeling clay (or breadcrumbs)
The mini
Dismantling the mini is very easy, it’s made for. You have to pull the rear bumper and lift the rear of the fairing at the same time. It is well explained in the manual, with photos (if in doubt look on youtube).
The Figaro
This is the part that bothered me the most! there is no user manual or tutorial on youtube… so follow me
Slide a scraper blade under the front bumper in a corner, and make a sort of sawing movement by pressing firmly
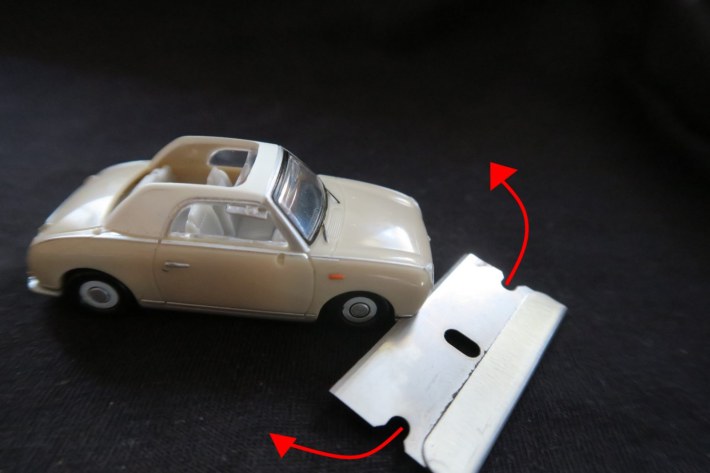
After about 50 round trips you will feel the blade advance suddenly, you have cut something…
This is what you cut:
Then you can do the same thing on another corner, or like me succeed in dislocating the other corners, one by one by forcing a little…
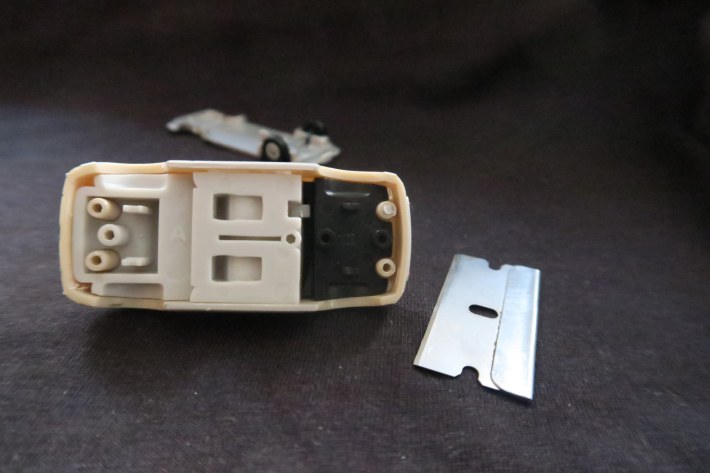
Once the floor is removed, it’s child’s play to disassemble the rest, just press the seats with a finger through the roof, in fact, the Figaro is made of a few parts assembled without glue.
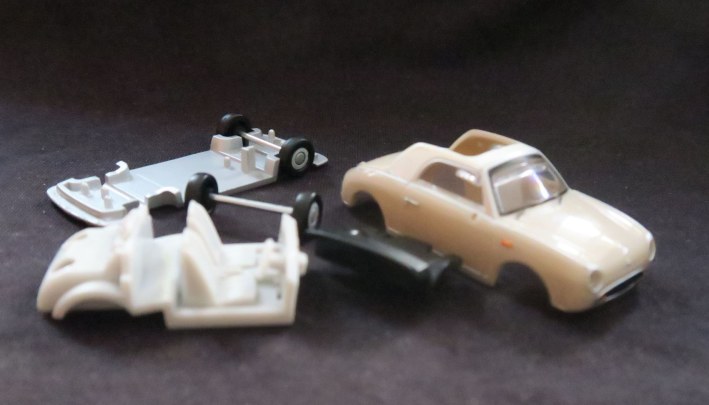
Take the time to observe the size of the two hulls… the proportions
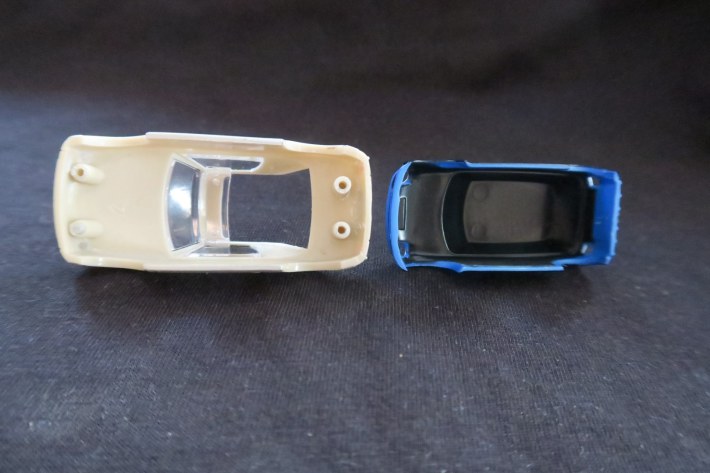
In fact, if the Figaro is at 1/64th, the mini is at 1/76th… the whole trick is there… we will be able to fit the complete mini into the Figaro!!!
– Note that the hull of the mini is made of two materials, the black interior is opaque to light…
– Note that the headlights of the Figaro are made of transparent plastic… and that unfortunately the bodywork of the Figaro lets light through
Preliminary work to be done on the hull/body frame of the Figaro
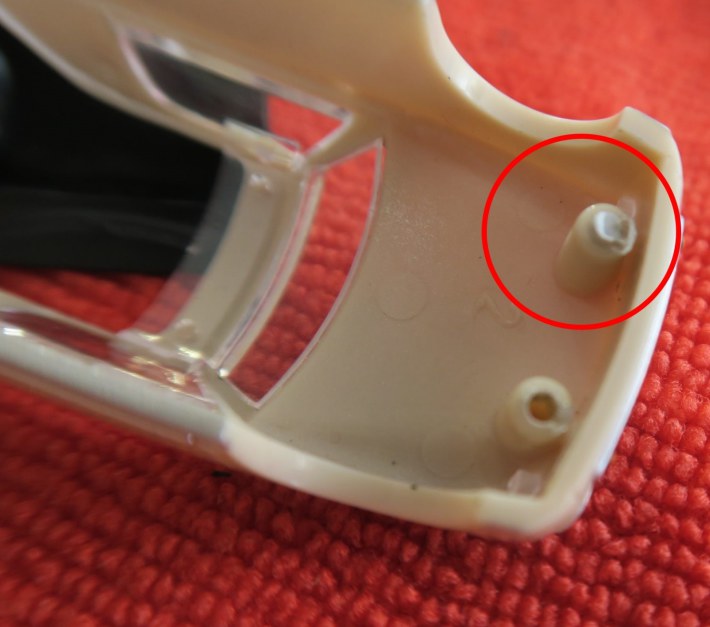
• Cut the 4 studs, using a nail clipper (or small cutting pliers) for example
• Glue the roof
Preliminary work to be done on the mini
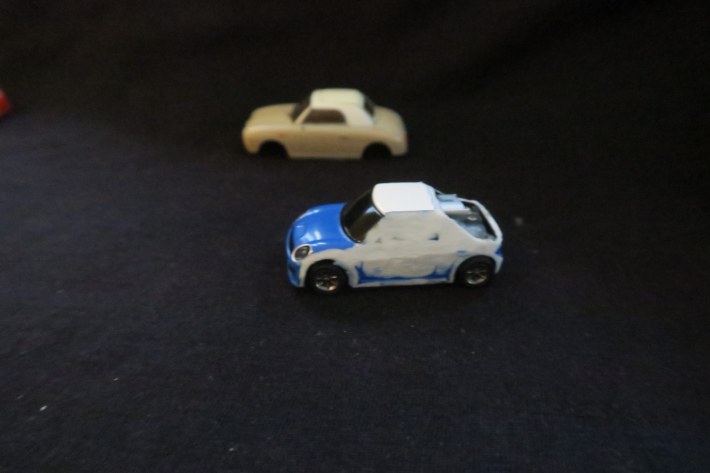
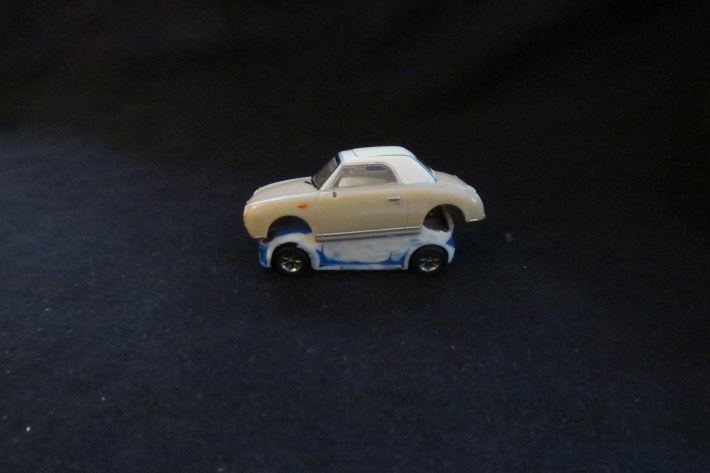
Sand the outside, cut a slanted side at the back like in my photo, until it fits almost entirely in the Figaro. Check regularly, so as not to remove too much plastic (do not start the black interior of the mini you would complicate your life unnecessarily). In the end, the floor of the mini must almost be flush with that of the Figaro to within a millimeter (to compensate for the thickness of the bumpers of the Figaro that we will put back at the end).
It’s really easy, but a bit tedious, especially if you don’t have a mini drill.
Now modify the fender cheeks so that the wheelbase of the Figaro matches that of the mini, using sandpaper rolled on a pencil for example, until their wheelbases are identical
Admittedly it’s not perfect, but it won’t really show up in the end…
You can already play with the set, but it’s not over yet! separate the 2 shells
Painting to do in the hull of the Figaro
Paint all the glass parts of the Figaro in aluminium colour with a single very thick coat, from the inside of course. If you overflow, it doesn’t really matter. Let dry completely before continuing.
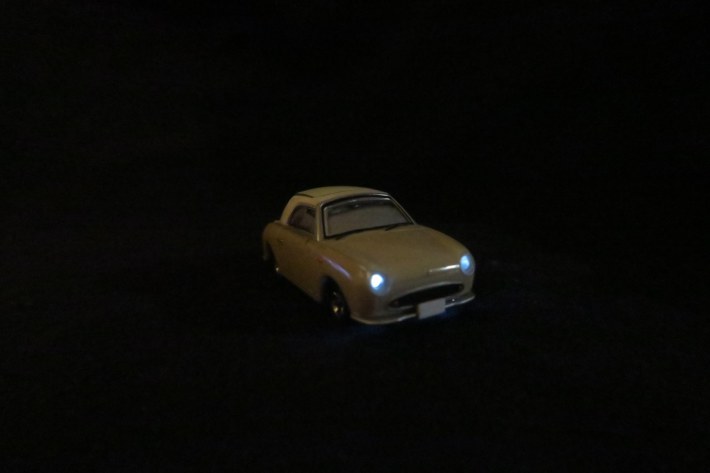
For the front headlights, the ideal is to work facing a lamp looking through the hull.
Glue two small balls of patatfix on the front headlights, right on the transparent plastic part… press down firmly on the ball using the handle of your brush, for example.
For the taillights, the concept principle of Kiss model making requires not to worry about it
However, if you feel like it, here’s how I did to get a result that I like.
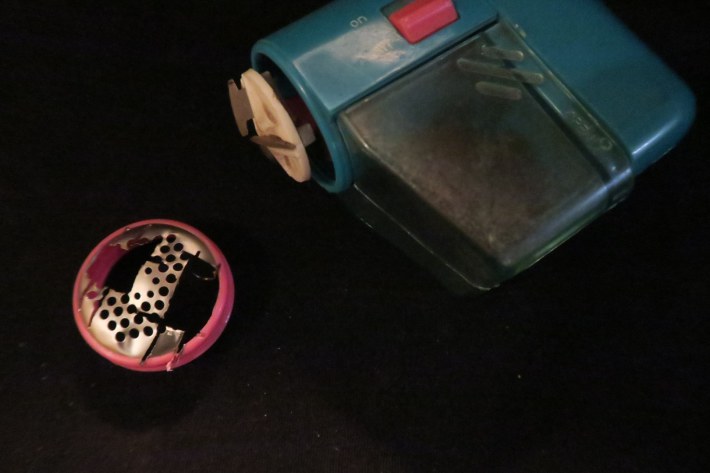
NB I had, in a drawer, a Chinese gadget supposed to mow the pilling of sweaters, which I sacrificed without regret because it had never really done its job…
I cut in its grid, two small tabs of metal with two holes each using a pair of scissors (the holes of the grid are 2mm in diameter). I stood in front of the lamp and I glued these two tabs just behind the rear lights. Once the glue was completely dry, I ran a 2mm drill bit with my fingertips in each hole of the tabs to remove a little of the material, without drilling completely…it’s long…. In fact it’s easier to do than it seems because the grid effectively prevents the drill bit from skidding. When the non-opening holes were made, I filled them with 4 very small balls of patafix… These micro balls are easy to put in place because if they overflow on the tab of the grid it is of no consequence, because the metal is opaque to light.
Once the headlights prepared as described above, and the taillights (or not), the hull of the Figaro must be made opaque to light. For this we are going to apply 2 to 3 coats of black, on the front part and the rear part… you must also cover the rear part of the glazing previously covered with aluminum paint if you overflow a little on the rear headlining, this does not is not serious, on the other hand if you overflow on the fields of the hull, on the cheeks of wings, wipe the surplus immediately using a piece of paper towel for example.
Keep your hands clean when handling the Figaro shell.
Do not hesitate to check the opacity in the light of your paint behind a strong lamp after each coat.
Try to leave unpainted: the headliner and the doors, to ensure better bonding between the two hulls later…. When your last coat is almost completely dry, remove the balls of patafix with a pin…. Scrape off any excess paint if necessary.
The paint is easy to apply, because you only paint the inside, there is no line of demarcation to follow…and that’s good because 1/64th is really small….
I forgot to take pictures of this step, sorry
Once the paint is completely dry, make a blank assembly by putting the two shells back together.
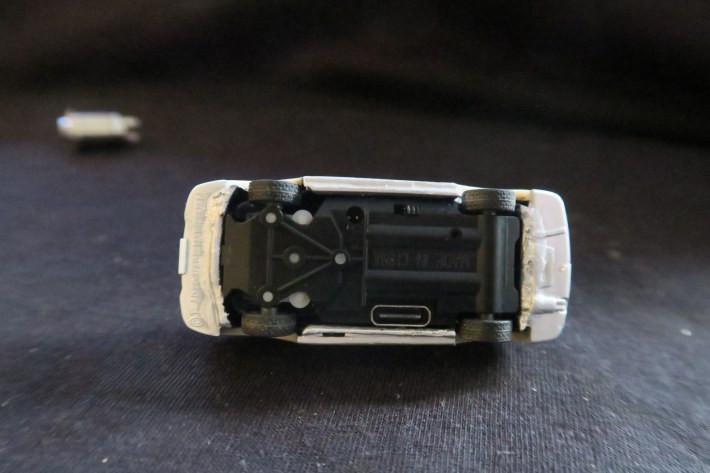
Temporarily put the mechanism of the mini back on and switch it on to check one last time that you haven’t forgotten an area of black paint.
The underbody of the hull of the mini must protrude by one millimeter from that of the Figaro (height of the bumpers)
Switch on the remote control and check that the front wheels can steer well without bumping into the Figaro’s wing cheeks. Correct if necessary by filing the wing cheeks and/or the excess paint.
Unpack the two shells one last time, put a small blot of expoxy glue on the headlining and a net on each interior of the doors.
Assemble the two hulls one last time, and hold with your fingers in the right position (if necessary) while drying…
Paint the underbody of the mini (which protrudes by a millimeter), it’s super easy by pulling the brush loaded with paint inwards.
Leave to dry for a long time.
The bumpers are recovered from the floor of the Figaro
To get a good idea of the shape you are going to need, press the front, and then the back on a piece of modelling clay (or breadcrumbs if you don’t have modelling clay)
File, adjust, and re-file until you get the shape of the imprint on the modelled tab
Put the mini mechanism back in place.
Glue the bumpers permanently.
Let the glue dry.
Paint the traces of glue under the bumpers using aluminium paint if there is any.
Let it dry one last time.
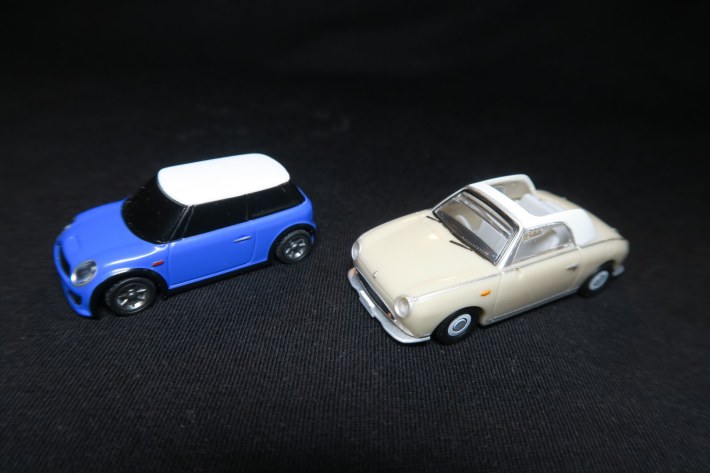
Conclusion: That all folks
NB The white spots on the photos below are flash reflections
One last piece of advice, only roll your mini Figaro on very smooth ground, it won’t like carpeting, poorly joined parquet slats and even less the exterior. This is also the case with the mini.
Its autonomy is 40mm according to the manufacturer, you do not have to recharge it after each use… the batteries only drain very little over time…
Good road and do not hesitate to show me your creations in this discussion thread
The characteristic beep-beep of our Figaro on this Liliputian RC model adds a touch of magic! if in addition, we stay in the concept of Kiss model making, why deprive ourselves of it?
Even working lights!
Parts
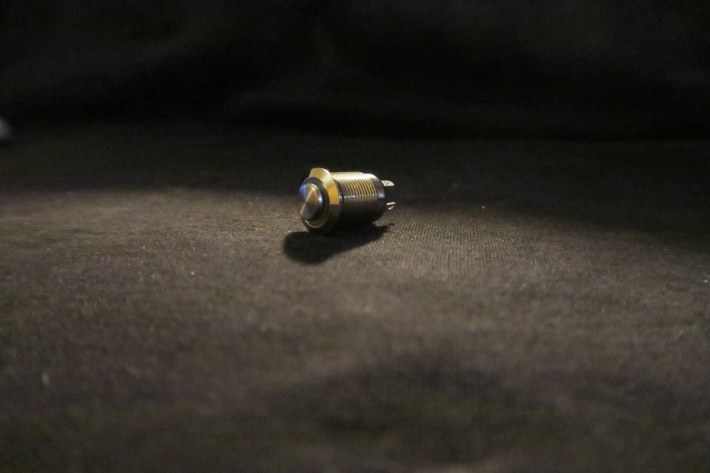
• A nice push button (recovery or otherwise with the magic of Amazon it’s €2.90 shipping included!)
• A modern smartphone
• An assistant
• An OEM beep-beep recording
(Click on this link to download the “beep-beep.mp3 file)
Electronics
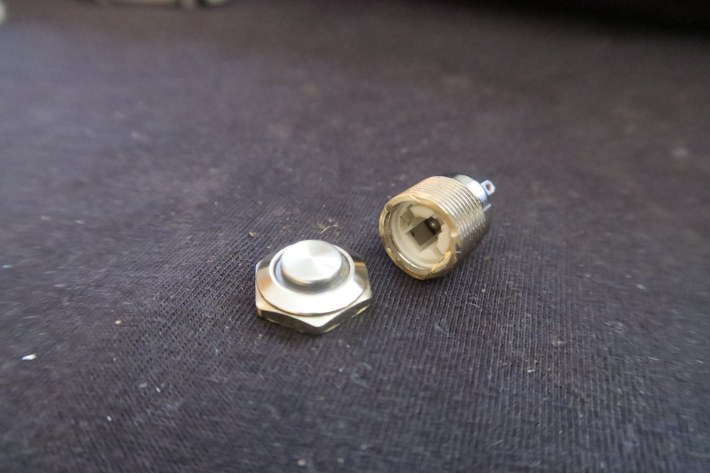
Cut the push button to keep only the front.
NB this was the hardest thing for me to do because I made the mistake of investing in a metal push button
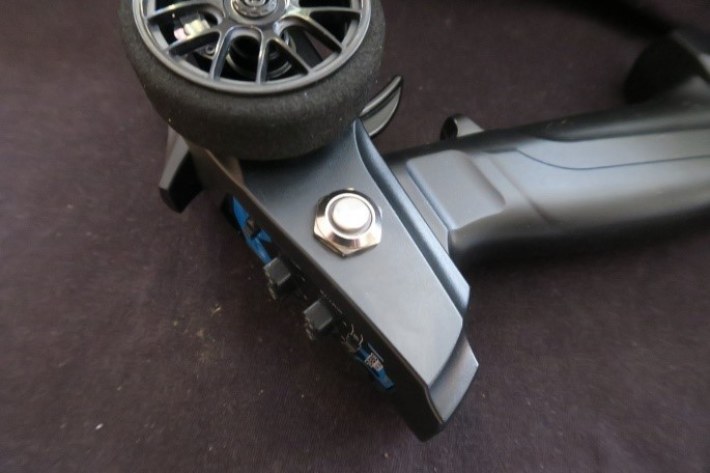
Glue the front of the button, in a place visible to all, and accessible on your remote control
The realization
Start by adding to your smartphone (if it is not already done) the assistant you have chosen in your contact list
Customize the sound of SMS received by this contact with the “beep-beep.mp3” file above.
Warn your assistant beforehand so that he is ready to send you an SMS as soon as he sees you press the button.
Implementation
During a demonstration of your mini Figaro, carelessly put your smartphone face down, right next to a place where you plan to pass your model.
After one or two laps of your improvised circuit, stop your mini Figaro, right next to the smartphone
Press the button, and keep it pressed until your assistant reacts (if necessary, plan a preliminary repetition with this one)
Conclusion
The effect is striking and magical… and you will be surprised by its effect on an uninformed public!!!
Credits
credit to the music like I did on youtube :
Titre: Lanmou
Auteur: Sojiada
Source: soundcloud.com/sojiadaLicence: creativecommons.org/licenses/by/3.0/deed.fr
DOWNLOAD THE BUILD PDF
You can download and print the instructions which include all the info above and pictures in a handy A4 pdf. Click here
WATCH THE VIDEO
Related posts:
 Children’s Nissan Figaro Book “Let’s Go for a Drive” by Naokata Mase
 Cushion Covers and T-Shirts from Figaro Smiles – Nissan Figaro
 Nissan Figaro Crossword – Test Your Figgy Knowledge!
 Keyrings from Steve Bettesworth – Nissan Figaro
 Nissan Figaro – CGI Figaro
 Watch – Figaro Owners Club (25th Anniversary) No Longer Available